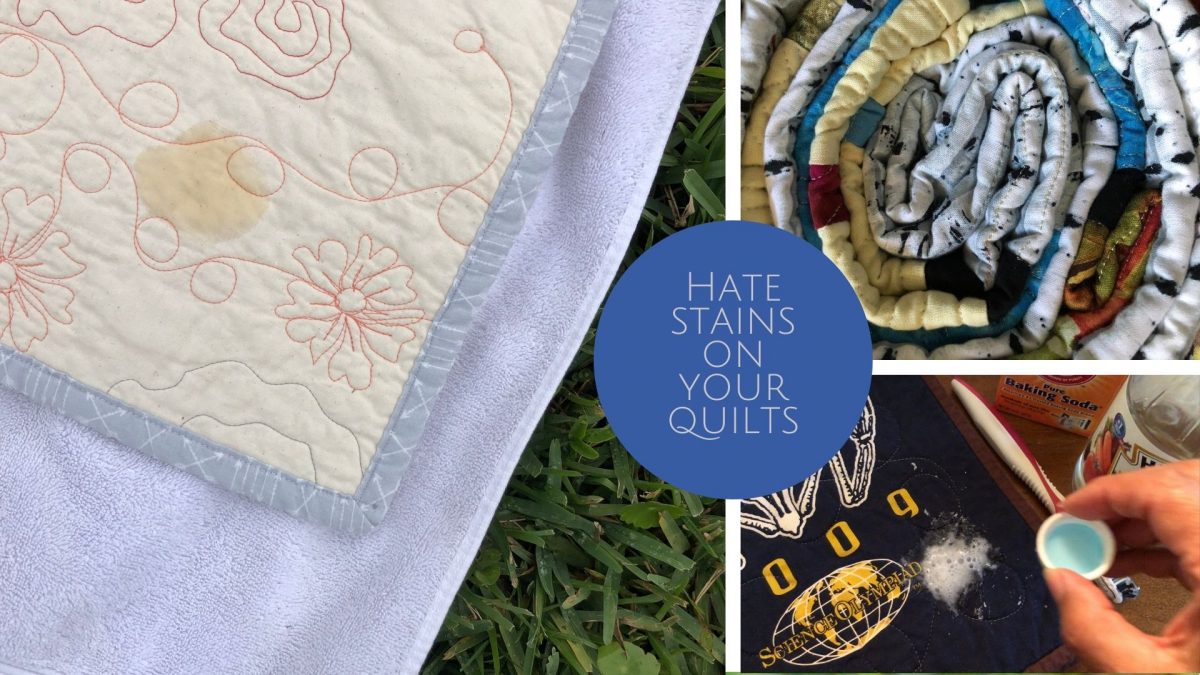
Do you hate stains on your quilts: check out these 6 solutions.
There’s always a need to take care of stains on quilts. I researched several solutions for different types of stains for you. Removing these stains can either eliminate the need to wash or be a precursor to washing. Of course, as I hope you are aware, the less washing a quilt gets, the better off it is.
I want to remind everyone that these solutions will work, but there is much variety in quilt fabrics, condition, age, etc. You need to test, test, and test to ensure you are using the safest way to remove stains without damaging the quilt material and color. Please be cautious with your precious quilts.
I have divided the stains into 6 categories; blood, grease, yellowing, mildew, rust, and general. There are definitely others, say wine….. First of all, should you really be drinking wine on your quilt? Well, as far as I am concerned, you are enjoying your quilt, and heck, you decide if it is worse for the wear. I say “no.” Besides, you didn’t get the quilt to make it wall art, did you? So go for it but be prepared to do some first aid now and then.
Ok, let’s get serious now. As I said, I’ve broken down the solutions into categories and also included some advice I’ve picked up along the way that doesn’t include chemical products.
Minor Repairs
Before washing or spot cleaning your quilt, it is a great idea to inspect your quilt for loose seams or rips and repair them.
Remember, no roughhousing with the quilt, strong tugs, etc., if you want your quilt to last. Be gentle. Maybe even add a few squirts of linen spray you love and sink into la-la land. I use herbs botanicals Natural Linen Home Spray; check it out HERE. That is unless the quilt belongs to a youngster, then let them have cake, I say.
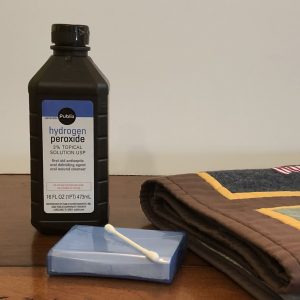
Blood
Here’s an interesting piece of advice. I am passing this on, but in full disclosure, I have not tried it. If you prick your finger while using your quilt, you can use your own saliva to remove the bloodstain. Yes, kinda gross. I wouldn’t do it with someone else’s quilt without permission.
Dampen a piece of cloth with your saliva, and rub over the stain. It should disappear. This only works with your own blood, or so I’m told. I’d try it on your own before you start drooling all over someone else’s quilt. Let me know if you try it, and it works for you, leave a comment below.
Hydrogen Peroxide – soak a Q-tip or cotton ball with household hydrogen peroxide and dab it on the spot. Let it sit for 30 minutes away from light or until the stain is gone. Rinse the area well.
Grease/Oil
Dawn Free and Clear – Mix Dawn with warm water. Soak the stain with the mixture. Rub gently and keep rubbing until you see the spot slowly disappear 5 to 15 minutes. It may not be 100% successful, but it will be much better.
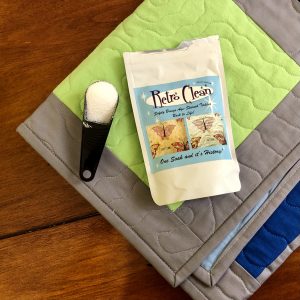
Yellowing
Why do quilts yellow? Stains on fabric can oxidize in storage, leaving behind a yellow or brown patch.
Retro Clean – You will need Retro Clean, water, and a tub. Check fabrics for colorfastness. Wash and rinse quilt to be treated. It is now ready to be soaked in the Retro Clean. It may need to soak for up to 48 hours. A tutorial is available HERE. Retro Clean can be purchased directly at www.retroclean.com.
Before storing your quilts, make sure they are clean. If you have vintage quilts consult a professional dry cleaner for the correct cleaning procedure.
Mildew
Mold is a type of fungus that loves warm, dark places. This unsightly spore will attach itself to whatever surface happens to be in the right environment; walls, furniture, or textiles–and one of those textiles could be a precious quilt you’ve been storing. Cleaning mold isn’t a pleasant task, but it’s essential. Mold has been linked to respiratory ailments, and well, it is just plain disgusting.
You usually avoid exposing textile to direct sunlight. In this case, sunshine is the best way to kill mildew without damaging delicate fibers. Leaving your quilt outside long enough to kill the mildew won’t damage the fabric but ignoring the mildew will. Once you have removed the mildew, let the quilt dry completely before storing or displaying if your quilt is still moist.
Baking Soda and Vinegar – You will need a toothbrush, cups, sink, baking soda, vinegar, water, and lemon juice. Follow the steps below to get rid of mildew on a quilt.
1. Spread the quilt on a tabletop or large work surface. Identify all the areas that have mildew.
2. Fill a cup with warm water. Pour a few tablespoons of baking soda into a small container. Dip a toothbrush in the water cup and then into the baking soda. Use enough baking soda to coat the brush bristles thoroughly.
3. Gently brush each mildew spot with wet baking soda. The soda will combine with the water to form a paste that is of toothpaste consistency. Dip the toothbrush in warm water and baking soda as needed for each spot.
4. Use the cap from the vinegar bottle to pour a capful of vinegar on each treated spot. The vinegar and baking soda will bubble; this is a chemical reaction and is normal.
5. Blot the mildew spot with a clean towel to absorb the excess vinegar mixture.
6. Fill the sink or a large plastic container with warm water and add 1 cup of lemon juice. Immerse the quilt area in the sink. Soak for 10 minutes, then drain the sink. Squeeze the water from the quilt by gently pressing the quilt against the side of the sink. Do not wring the quilt.
Store the quilt in a dark, dry cabinet, or display it away from moisture and direct sunlight to protect it from mildew and other damage in the future. All those stories you hear about grandma’s quilt in the attic, don’t do it. Attics are usually humid and very hot. Both aren’t good for quilts.

Rust
Rust stains are caused by dissolved iron in drinking water, i.e., the water you wash with. Well water, natural and municipal water supplies can have a high iron content that causes rust stains to form. They may not be obviously seen when the quilt is in use but may appear after taking your quilt out of storage.
Vinegar and Salt: You will need white vinegar and salt. Moisten a soft cloth or cotton ball with white vinegar, blot the stained area to moisten it thoroughly, cover the stain with a layer of salt, then rub the vinegar and salt together on the stained area with your fingers. For better results, lay the quilt with the wet spot on top of a towel in direct sunlight until the stain fades. Wash the area or the entire quilt.
If rust stains are a concern for you, hand wash your quilts with distilled water before placing them in storage.
General
Grandma’s Secret Spot Remover – No, not your grandma’s personal spot removing secret. There is a product called Grandma’s Secret Spot Remover. You can buy online. Go to the website for more info HERE. It comes in liquid or spray. Simply apply on stain. Follow product directions. Rinse when the stain is gone–test fabric before use.
I want to reiterate, I am focusing on current quilts in use, not vintage. I say that over and over because as a quilt begins to age, the fibers get more delicate. And truly, you get more and more attached to the quilt. You need to be much more careful with quilts like that.
Depending on the condition and age of your quilt you may want to visit with someone who is knowledgeable of older quilts.
I also believe that the care you take with quilts is your decision, new or old. You can follow all care recommendations or none. I think most of us will live somewhere in the middle. Your quilt could look new 10 years from now.
Or…..if you gift a quilt to a daughter or son and know that it will end up on the floor in a 5 college student housing and the kids eat pizza on it. You shouldn’t worry about having your student care delicately for it. I’ve seen many a quilt be loved and abused unintentionally. Your young adult will love their quilt and have cherished memories of it, but it may not live past their college years. And that’s ok too.

Although I do have to say all of my daughters’ quilts have outlived their college years and still look good, no worse for the wear. They survived rower housing activities, pets, parties, etc., which I’m surprised but pleased to see.
Do you have other tried and true solutions for stains? Share them. I, for one would love to hear and have more ammunition in my arsenal.